As a mom my wardrobe consists mainly of jeans and t-shirts, most that have seen better days. For the most part these clothes are great – I mean who wants to climb up the fast food play area steps to retrieve a 1-year-old in designer clothes! But sometimes I wish I could have a few new things. Of course I am the stingiest shopper when it comes to clothes. Mostly just for MY clothes. I don’t really like to buy anything that isn’t on sale. So when I found this Circle Shirt tutorial on Pinterest I was excited to find a new look that I could make on the cheap!
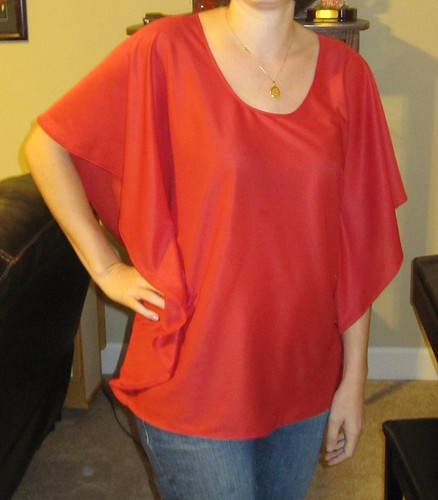
Jenn at The Craft Patch has laid out a great tutorial for making this shirt. It was pretty easy to make, even for me and I am a sewing newbie!
A NOTE: At The Craft Patch, Jenn explains that getting a knit fabric that does not fray is especially important. She used a jersey knit fabric (t-shirt material) and left the edges raw (no hem). My plan was to use the same type of fabric, but when I was at the fabric store a red, shiny knit fabric caught my eye and I thought it would look great for the shirt. I figured it would be worth giving it a shot to try! I probably could have left the edges raw, but felt that due to the fabric that I used, the shirt would have a more finished look if I hemmed the edges.
For this project you will need:
• 1 yard 60” wide knit fabric
• Matching thread
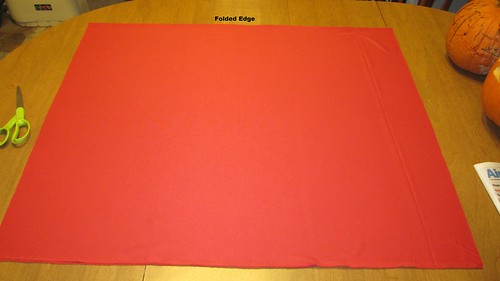
Start with your fabric laid out folded over one time. This will basically be just laid out as it came home from the store. Good sewing etiquette says you should iron out your fabric, but if it is pretty smooth already, it isn’t overly important for this project.
Round off the bottom (unfolded) edges of the fabric. I just did this free hand with my scissors, but you could also mark the fabric first if you wanted.
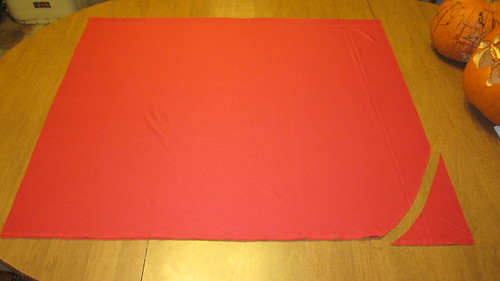
After cutting the first corner I laid the cut-off piece on the other fabric corner as a guide to make both edges cut the same way.
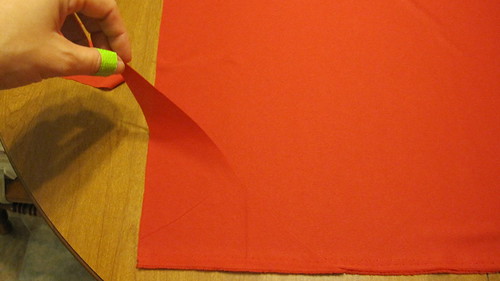
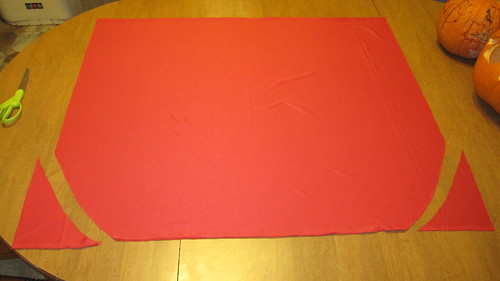
Next cut the neck hole in the folded side of the fabric. Use an existing shirt with the general neckline you would like as your template for cutting the neck hole. I used a nice fitting tank top. Line up the top of the shirt’s neckline with the folded edge of your fabric, then cut around the neckline. As shown in the picture I cut the small (back) section of neckline through both layers of fabric. Then cut the top layer only for the front neckline. I had to estimate this as well by just looking at the neckline on my tank top.

Unfold your fabric and refold the other direction. This will allow you to make sure that the neck hole and curved edges are symmetrical. Trim up as needed.

At this point I sewed a small hem around the neckline and entire outer edge of the shirt. I took a ¼” seam all the way around both edges (edge of shirt and neck) and then repeated, folding over the small seam. This gave the edging of my fabric a better look.
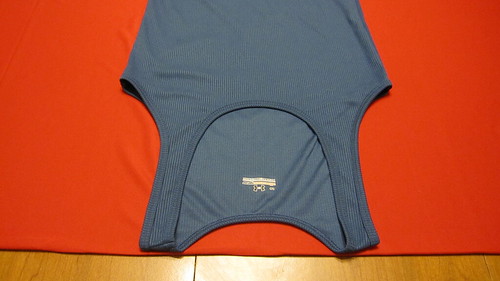
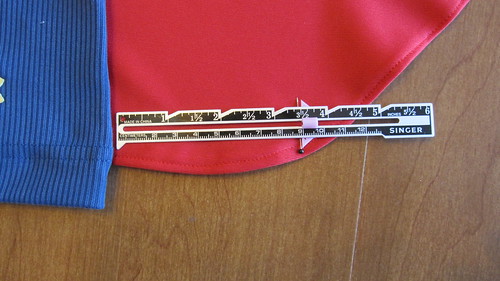
To make the armholes separate from the main shirt body, you will sew a line up each side of the fabric to fit around your body. You don’t want the lines to be too close together or the shirt will not go on (any questions as to how I figured this out?). Trust me – do not learn the hard way. :) For my second go-around, I used my tank top as a guide and made my lines 3½” out from the edge of the tank top. Fold the fabric back on the original (top) fold and lay the tank top down lined up with your cut-out neck hole. I used a seam gauge to measure out the 3½” from the edge of the tank top and marked it with a pin. I laid out the seam gauge perpendicular to the shirt edge to make my pin line curve, just like the sides of the tank top. I also marked the top (end) of my seam line with a sideways pin, about 2 inches below the armhole of the tank top.

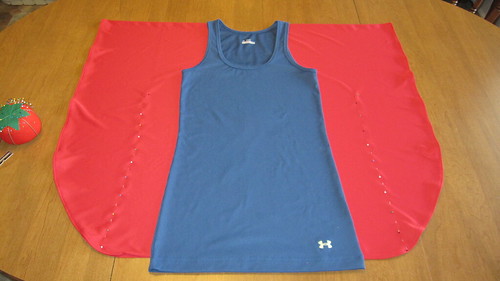

Sew along your marked lines, removing the pins as you go. You are done! Enjoy your new shirt!
Sources: The Craft Patch
No comments:
Post a Comment